Now that we’ve all had a chance to try on some Cyberpunk 2077 gear in game, it’s fair to say you may have to prioritise substance over style. Cyberpunk appears to randomly assign stats to any piece of clothing you find, meaning your favourite military-grade trousers may not be as protective as a colourful pair of shorts. Don’t worry, there are steps you can take to ensure your version of V looks the part without having to sacrifice the stats.
It’s important to wear gear with high armour stats, especially against some of Cyberpunk 2077’s most dangerous enemies, including Cyberpsychos and bosses. Wearing certain gear can grant you resistances against a number of status effects, so if you want to avoid taking damage over time, you’ll want to pay attention to the gear you’re wearing.
Don’t be so quick to disassemble your favourite set of clothes for crafting materials – you might be able to upgrade them. If you choose the correct set of Cyberpunk 2077 perks, you can increase your body’s defence to the point where you can wear any gear you want.
How to upgrade your Cyberpunk 2077 gear
By utilising the crafting system early on, you can continuously upgrade your gear throughout the course of the game. There are limits to this, however, as some items feature level caps which stop you from upgrading them beyond a certain point. You can avoid this altogether by purchasing gear from a vendor or craft your own clothes – this will remove this upgrade cap entirely.
You’ll want to invest points in Technical Ability and the crafting skill tree, giving you the ability to begin stockpiling materials. Crafting materials don’t weigh anything, allowing you to store as many in your inventory as you want. You may not be too fussed about upgrading your gear just yet, but you should still unlock the Scrapper and Mechanic perk early on to create a stash of materials.
As you continue to upgrade individual pieces of gear, the upgrade cost will gradually rise. You can mitigate this with the Let There Be Light perk, lowering the overall upgrade cost by 20%. The reduction in cost also stacks alongside the skill progression rewards you earn from crafting general items. The Efficient Upgrades perk introduces an element of luck to the crafting system, giving you a 10% chance to upgrade an item for free.
Cyberpunk 2077 Subdermal Armor
The Subdermal Armor (Integumentary System) implant increases your armour by 200, an absurd amount given its relatively low cost of just 14000 Eurodollars. You can find the ripperdoc with this implant by heading to the southwest of Kabuki, not far from the Gun-O-Rama shop. With the Subdermal Armor implant, you won’t need to worry about your gear’s stats as the implant should keep you protected no matter what you’re wearing.
Related: Check out the best Cyberpunk 2077 builds
You can increase your armour even further by spending points on the Slow and Steady perk in Blades. By investing two points into this perk, your armour will increase by 30% while moving. The only reason not to pick up this perk is if you’re playing a stealth or sniper build, but for everyone else this perk is essential. Despite being located in the Blades skill tree, this perk works perfectly for anyone using melee weapons or regular guns.
If you’re going for an Athletics build, you’ll want to aim for the Steel Shell perk that increases your armour by 10%. By combining the Subdermal Armor implant with both of these perks, you can increase your base armour from 200 to 280. Remember, that doesn’t include any gear whatsoever, so you can double this number with the right armour sets.
Cyberpunk 2077 Armadillo mod location
Providing your clothes have a mod slot, you can make any piece of gear viable using the Armadillo mod. The Armadillo mod adds extra armour to your gear, but what makes it special is that this mod scales to your level. Crafting an Armadillo mod uses very little resources, so creating a new one each time you level up won’t break the bank. You can take the worst gear in the game and as long as it has a mod socket, you can turn it into powerful armour.
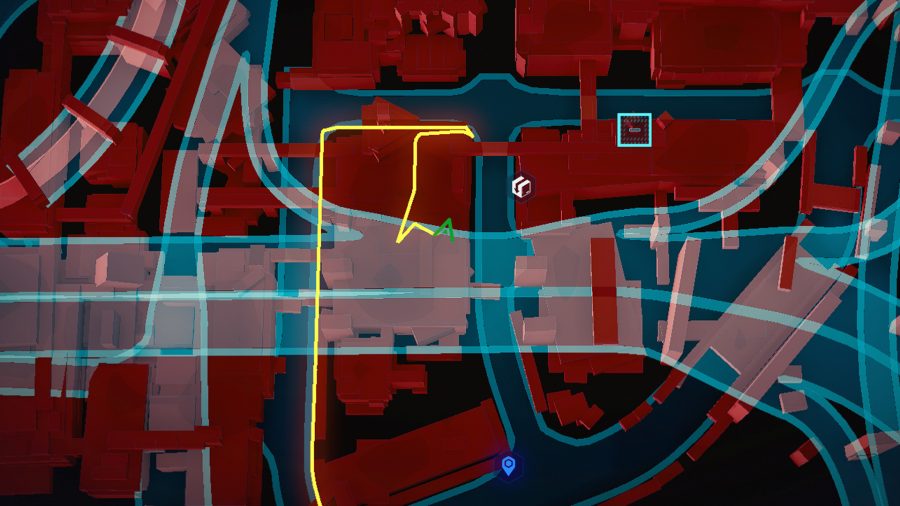
Finding the Armadillo mod can be tricky, but we’ve managed to locate an area where the crafting spec will always spawn. Head to the Watson District and look for the icon indicating the gig, Assault in Progress. If you’ve already completed this gig, be sure to look at our screenshot for reference. The Armadillo crafting spec is located inside the garage, but you may have trouble finding an entrance as all the doors are locked. Walk around the building to find a narrow entrance with a car parked outside.
There are enemies located within this garage, but you can run past them to steal the contents of the box. Once you’ve acquired the Armadillo crafting spec, you only need a few points in Technical Ability to craft this mod. This is by far the easiest way to improve your gear as the requirements are extremely low.
And that’s all you need to know about the gear system in Cyberpunk 2077. Nobody said looking great was easy, but hopefully you’ve learnt some ways to remain protected and fashionable at the same time. Check out our Cyberpunk 2077 iconic weapons guide to find some beautiful guns to match your outfits.


